BuildAndRun Knowledge Base
Create a project
After creating clients and templates, it is possible to create a project and assign tasks.
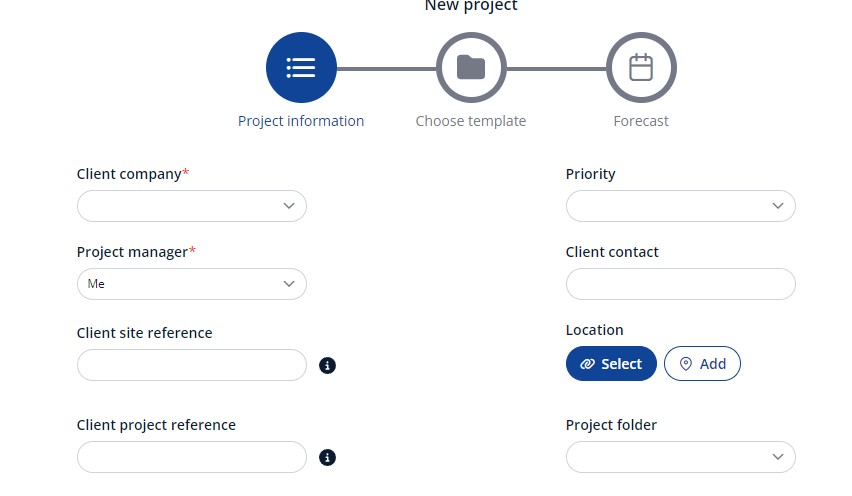
The Administrator or the Manager user clicks on the “New Project” button:


Mandatory fields
Mandatory fields are marked with an “asterisk” icon:
- Client: Client companies can be created in the “Settings” menu, or from this screen by clicking on the “Add” button.
- Manager: Name of the user that will be shown as the main contact during the project duration.
Other important fields
Other important fields are:
- Client Site reference: This is the reference for the “logical” site used by the client (site code and/or site name, i.e.; S1234_CityName).
Note: Each client is considered a tenant on a “Physical” geographic ”Locations”. Physical locations can be created in the dedicated menu (tower icon). If not already present, the location can also be added (or linked) anytime after the project creation process, in the Project details.
- Location: this is the physical location where the site is hosted. If not existing, a location can be created during project creation or at a later stage when the exact address is known.
- The “Project folder” dropdown list shows all the folders available for the connected user on Google Shared Drives (recommended) or Sharepoint site. It is necessary that all employees later uploading pictures or documents when writing project reports in Build And Run have also write access to this folder (Cloud provider settings).
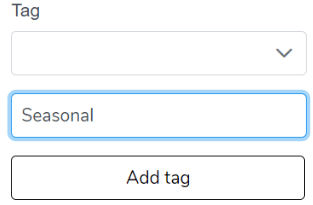
In the “advanced” section, tags can be configured to add a sorting “key” for this project later, for example, “seasonal” in the capture below:


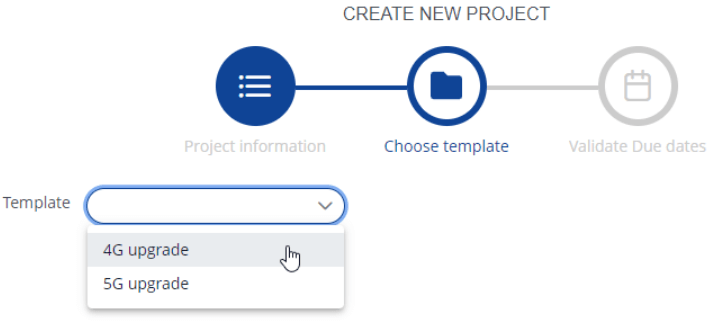
Tasks names, delivery times, and milestones are those of the template and are shown for information (not editable). Step 3 will calculate the due Dates for the project being created and will be editable.
In Step 3, due and forecast dates are calculated for each task with two options:
- Start date: delivery times will be added to the calendar date selected
- End date: delivery times will be subtracted from the end calendar date selected

Note: Baseline (due) dates are calculated on project creation based on templates’ standard delivery dates. They cannot be changed once the project has been created. However, changes in the plan can be done anytime with the “Forecast” date.
